1) Your name and email address
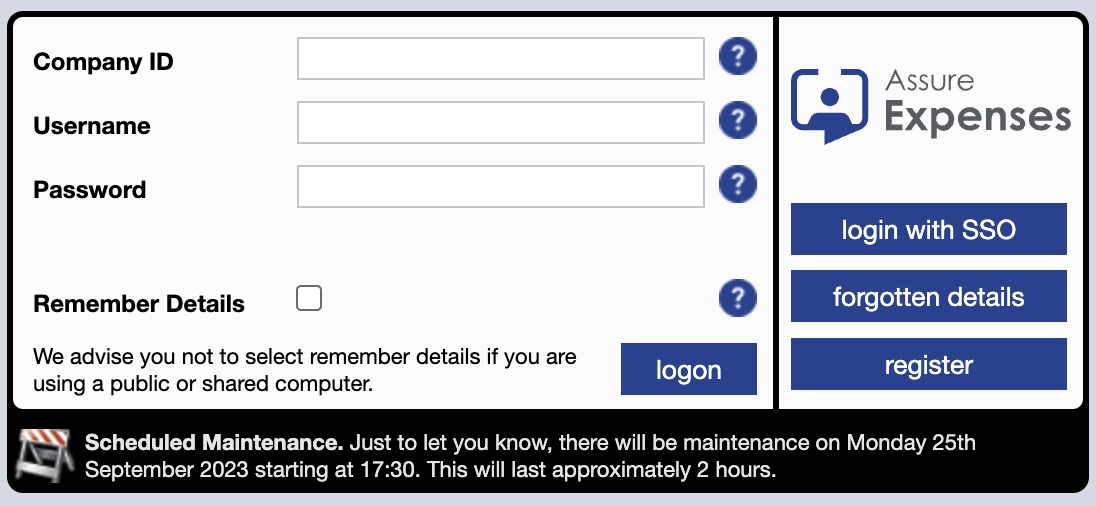
On the Assure login page, click on the register button.
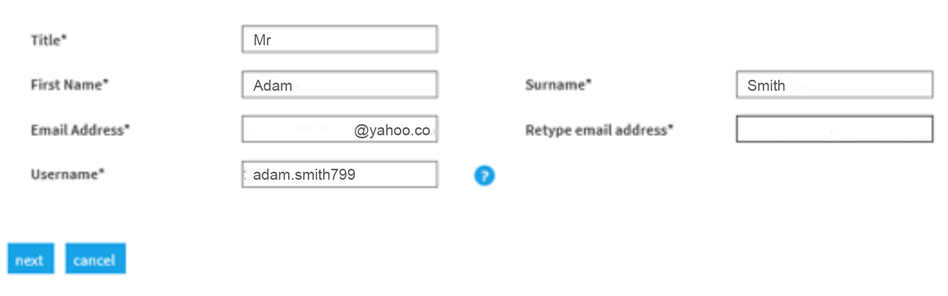
There are a number of steps, that need completing with your details. The system will ask for ‘Employee’ details, but you should enter personal details as applicable.
You will only move onto the next page once all the boxes in your current page are completed successfully. You can click the ‘previous’ box to move back when shown.
Enter your name and email details and the system will generate the username, using the first half of your email.
There are 2 errors that might arise from entering data on this page and clicking the ‘next’ button.
Error 1: ‘Sorry, the email address you have entered is invalid or your company does not use self registration’
Either your email is not valid or the link you have used to register is not the correct one. Make sure you are using https://heenon.sel-expenses.com
Error 2: ‘The username you have entered has already been used. Please enter a different username.’
This means you have already registered but your account is not yet active. Please do not change the username, your account will be activated during office hours Monday to Friday, after which you will receive an email containing a summary of your login information.
2) Create a password
When prompted enter a password to use when logging in.
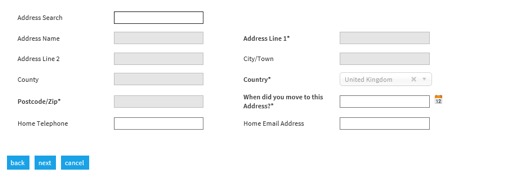
3) Add your address
Start typing the first line of your address in the top box, and it will bring up a list to choose from. You can also add a post code and search that way. Add a date as required and re-enter your email in the ‘Home Email’ box.
4) Select NHS England approval
Once you have selected ‘NHS England Approval’, click the next button.
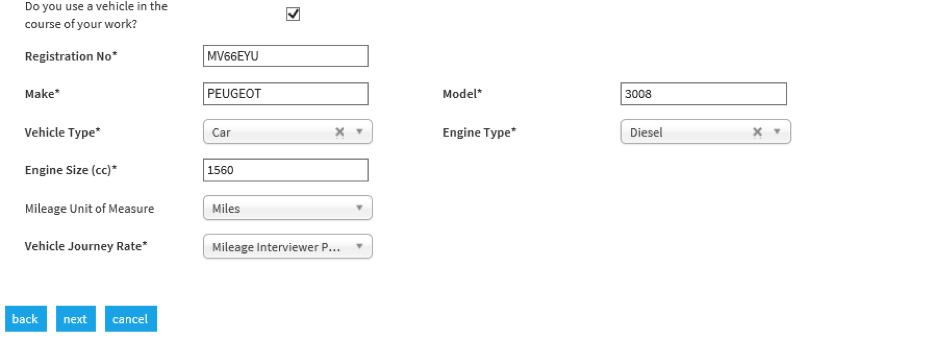
5) Add vehicle details
If you intend to claim mileage, tick the box and fill in your vehicle details. Other vehicles can be added after registration. Make sure all boxes are completed as this will cause issues when you add a mileage claim. You must select ‘Mileage Interviewer Panel Member – Mileage (Interviewer Panel Member)’ under the ‘Vehicle Journey Rate’ option. This page can be left blank if you do not intend to claim for mileage.
6) No vehicle has been added
If you have not entered any car details, click on the ‘Next’ button. The Oriel Candidate PIN is not required for School expenses.
7) Summary of details
The final page will summarise all the information you have entered. Please check you are happy with all the details before you click ‘Finish’. You can navigate back using the ‘Previous’ button (rather than clicking your browser back arrow) if you need to change anything.
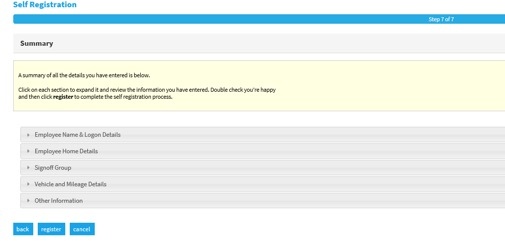
Once you have finished you should see the following message:
‘Thank you for registering with Expenses. You will shortly receive an email containing a web link. Simply click this link to verify that the details you have just entered are correct.’
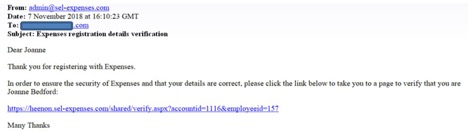
8) Verification and activation emails
Your verification email will look like this; you may need to check your Junk/Spam folders if the email does not appear in your Inbox.
Once you have clicked on the link in your email and the details are verified, you will get a further screen on the Assure system with the following message:
‘Thank you for confirming your details. Your Expenses account will now be activated by your system administrator. Once your account has been activated, you will receive confirmation by email and be able to use Expenses.’
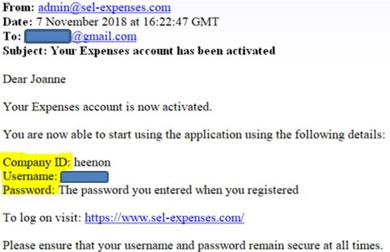
Your account will now need to be activated by the Expenses Admin Staff. This will happen during office hours, Monday to Friday. You will need to receive the activation email before you can login. The activation email will look like this and it will summarise your login details. Once again you may need to check your Junk/Spam folders if the email does not appear in your Inbox.
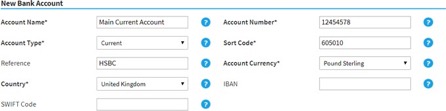
9) Add your bank details
Once you have logged in, you will need to go to ‘My Details/My Bank Details/Add Details’ to safely add the account and sort code you wish your expenses payment to be made to. You will not be able to submit a claim until this step has been completed.
If you have a building society roll number, add it to the ‘Reference field’. If you have a UK bank account, please ignore the Swift and IBAN boxes. For non-UK payments, ensure the Swift and IBAN fields are completed.
Click on ‘New Bank Account’ and the following screen will appear; the title boxes with an asterisk are mandatory.
You should now be able to add a claim. If you need any help with this process you can contact the Expenses Admin Team at england.heenon@nhs.net