Set up your email preferences
To receive email notifications from OneFile you need to set your email preferences. Go to your profile and click on the ‘Email preferences’ tab. This is accessible from the homepage once you have logged in and is at the top right of every page. You can sign up to receive email notifications every time something happens for you in OneFile or as a daily digest which summarises relevant activity for you once a day.
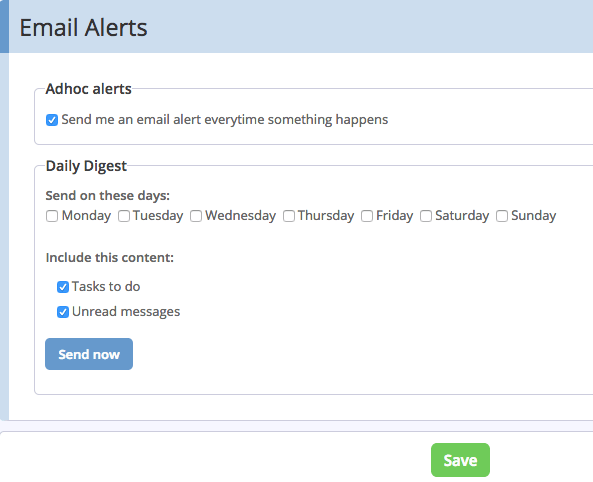 1. Setting your email preferences
Pay attention to messages and tasks
In addition to email notifications OneFile provides you with notifications inside the system. For example, if an assessor has reviewed a submission of a competency you will receive a message about this in OneFile. If an assessor has asked you to acknowledge their feedback on a submission you will be set this as a task. Your homepage displays whether you have received any new messages or tasks.
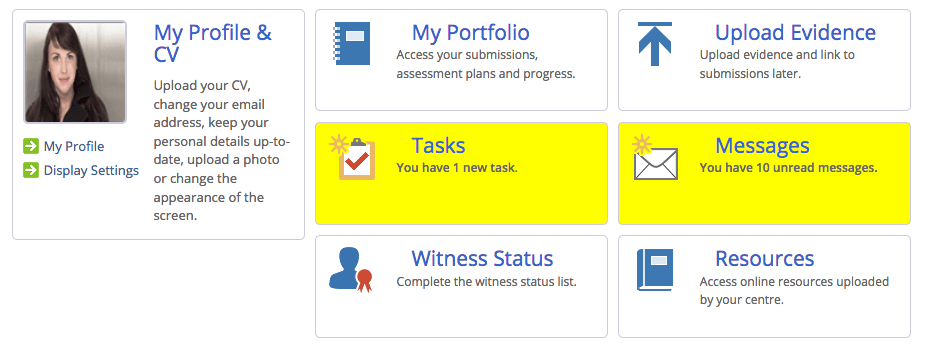 2. Example of a trainee homepage
You can also access your messages and tasks via the icons at the top right of every page in OneFile.
![]() 3. The messages and tasks icon
3. The messages and tasks icon
Upload a profile picture
The first task that you will see in your task list is to edit your profile and upload a profile picture. We recommend that you complete this task early as it will help assessors, that you may only see on rotational placements, remember who you are.
Take a look at the gap analysis view of your progress
In the ‘Progress’ section in the left-hand menu, OneFile provides you with a series of useful tools for understanding and viewing your progress. The best of these tools is on the ‘Gap Analysis’ page. This gives you a clear view of what you have to do and what you have already done. When you start using OneFile we recommend that you visit the Gap Analysis page, select ‘Show all’ and then click ‘Apply’. You will now see a page presenting you with everything that you have to cover in your workplace-based learning.
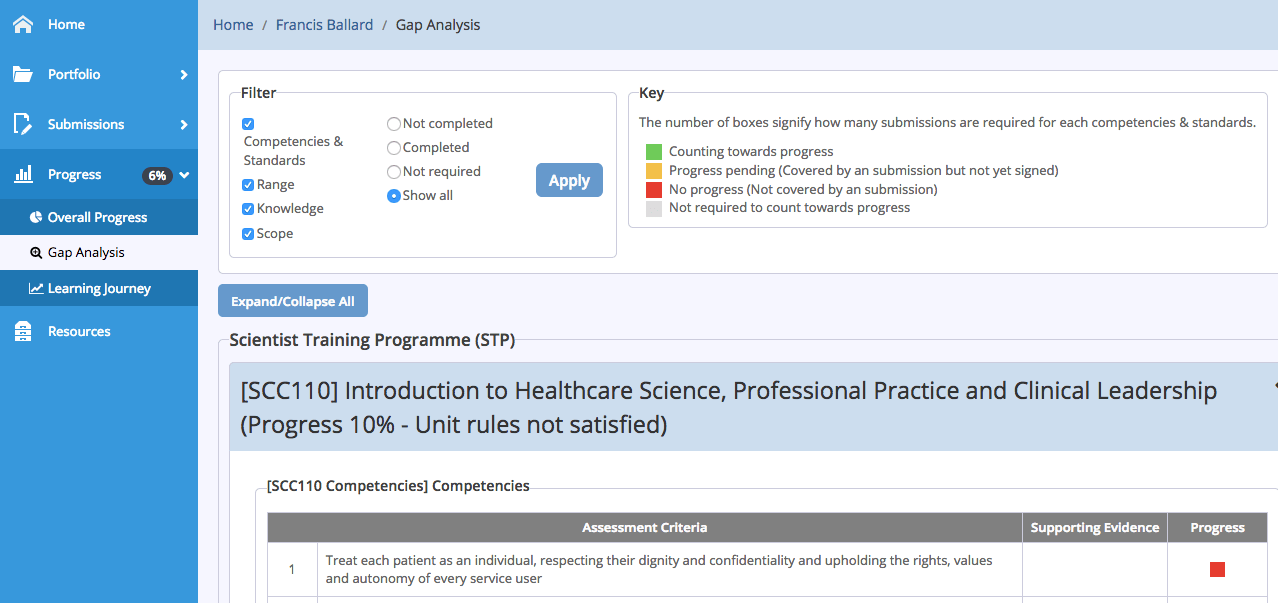 4. The gap analysis view of progress
Show the detailed view of your overall progress
To get the best out of the ‘Overall Progress’ view, visit the ‘Overall Progress’ page and select the ‘Show detailed view’ check box at the top right of the page. From now on every time you visit the Overall Progress page you will see the more detailed presentation of your progress across all your modules.
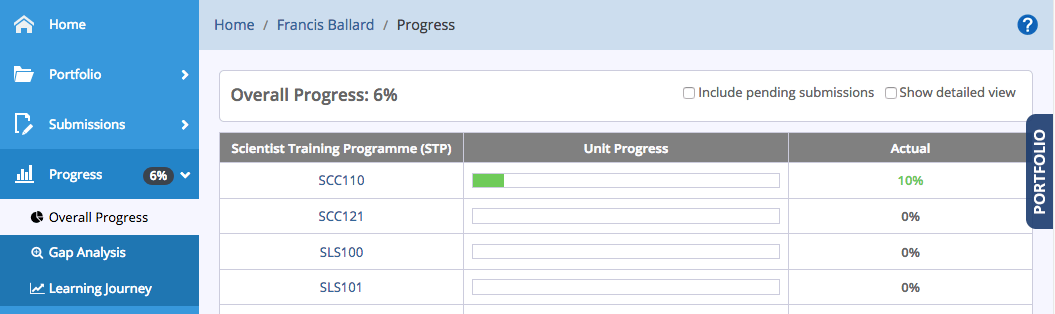 5. The overall progress page and show detailed view option
When you make your first submission, choose the gap analysis view of competencies and standards
When you make your very first submission of a competency or assessment, you will be asked to select which competency, standard or assessment you are submitting evidence for. To make this selection click on the large + button.
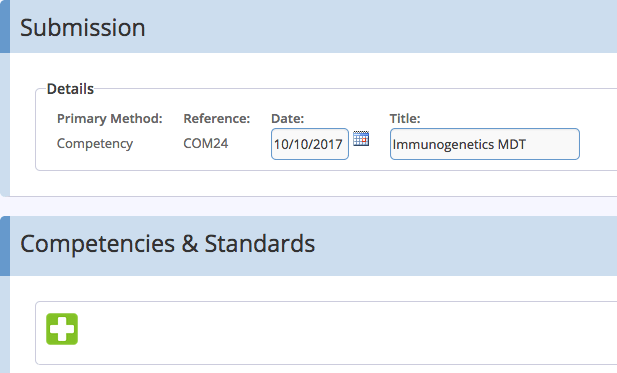 6. Select a competency or standard when making a submission
You will be presented with all of the competencies or standards you can choose from. We recommend that you select the ‘Gap Analysis’ view of the competencies or standards.
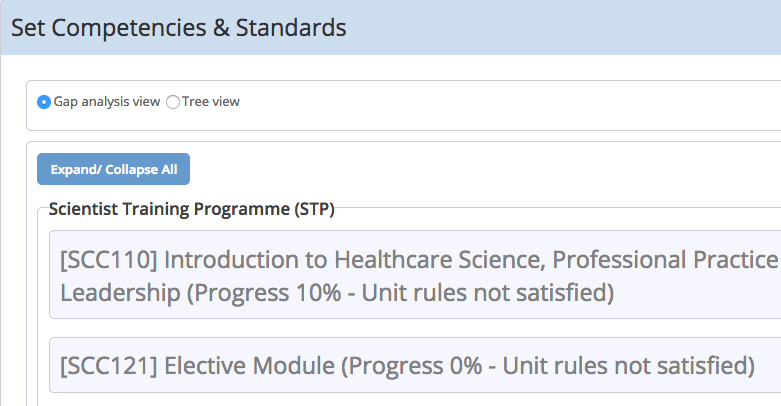 7. The gap analysis view of competencies or standards
When you make your first submission, choose to show descriptions of the competencies or standards you have selected
When making your first submission of a competency or assessment, choose the competency or standard that you are submitting evidence towards and click ‘Save and Quit’ to proceed to the page where you can input and attach your evidence. On this page you are presented with a view of the competency or standard that you have selected. The default view of the competencies you have selected is not very helpful. We suggest that you click on the ‘Show Descriptions’ button so that you are presented with a more detailed view of your selections.
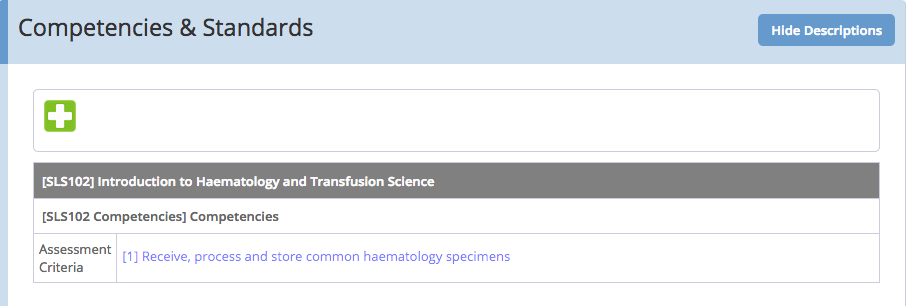 8. Selected competencies with description
Understand the ‘Save and Quit’ function
When submitting competencies and assessments in OneFile, it is important to understand what OneFile means by ‘Save and Quit’. You click on ‘Save and Quit’ when you want to progress with a submission. When you first select the competencies or standards that you want to submit evidence towards, you click ‘Save and Quit’ to progress to the page where you can input and attach evidence. When you have input all of your evidence and signed your submission click ‘Save and Quit’ to submit your evidence to your assessor.
So, ‘Save and Quit’ actually means go forward.